Earlier this week, Microsoft made a surprising move by announcing Copilot for Windows 10. Previously exclusive to Windows 11, Copilot is coming soon to the previous-gen operating system that still powers over one billion devices.
If you do not plan to upgrade to Windows 11 any time soon but do not mind trying Microsoft's latest AI-powered assistant, here is how to get it right now (shout out to Albacore @thebookisclosed on X for sharing the findings). Alternatively, you can take a more cautious route and wait for Microsoft to deliver Copilot to your system "organically" whenever it feels like your system is ready. The update containing the necessary bits should arrive in the Stable Channel soon, but the Copilot's staggered rollout will take longer.
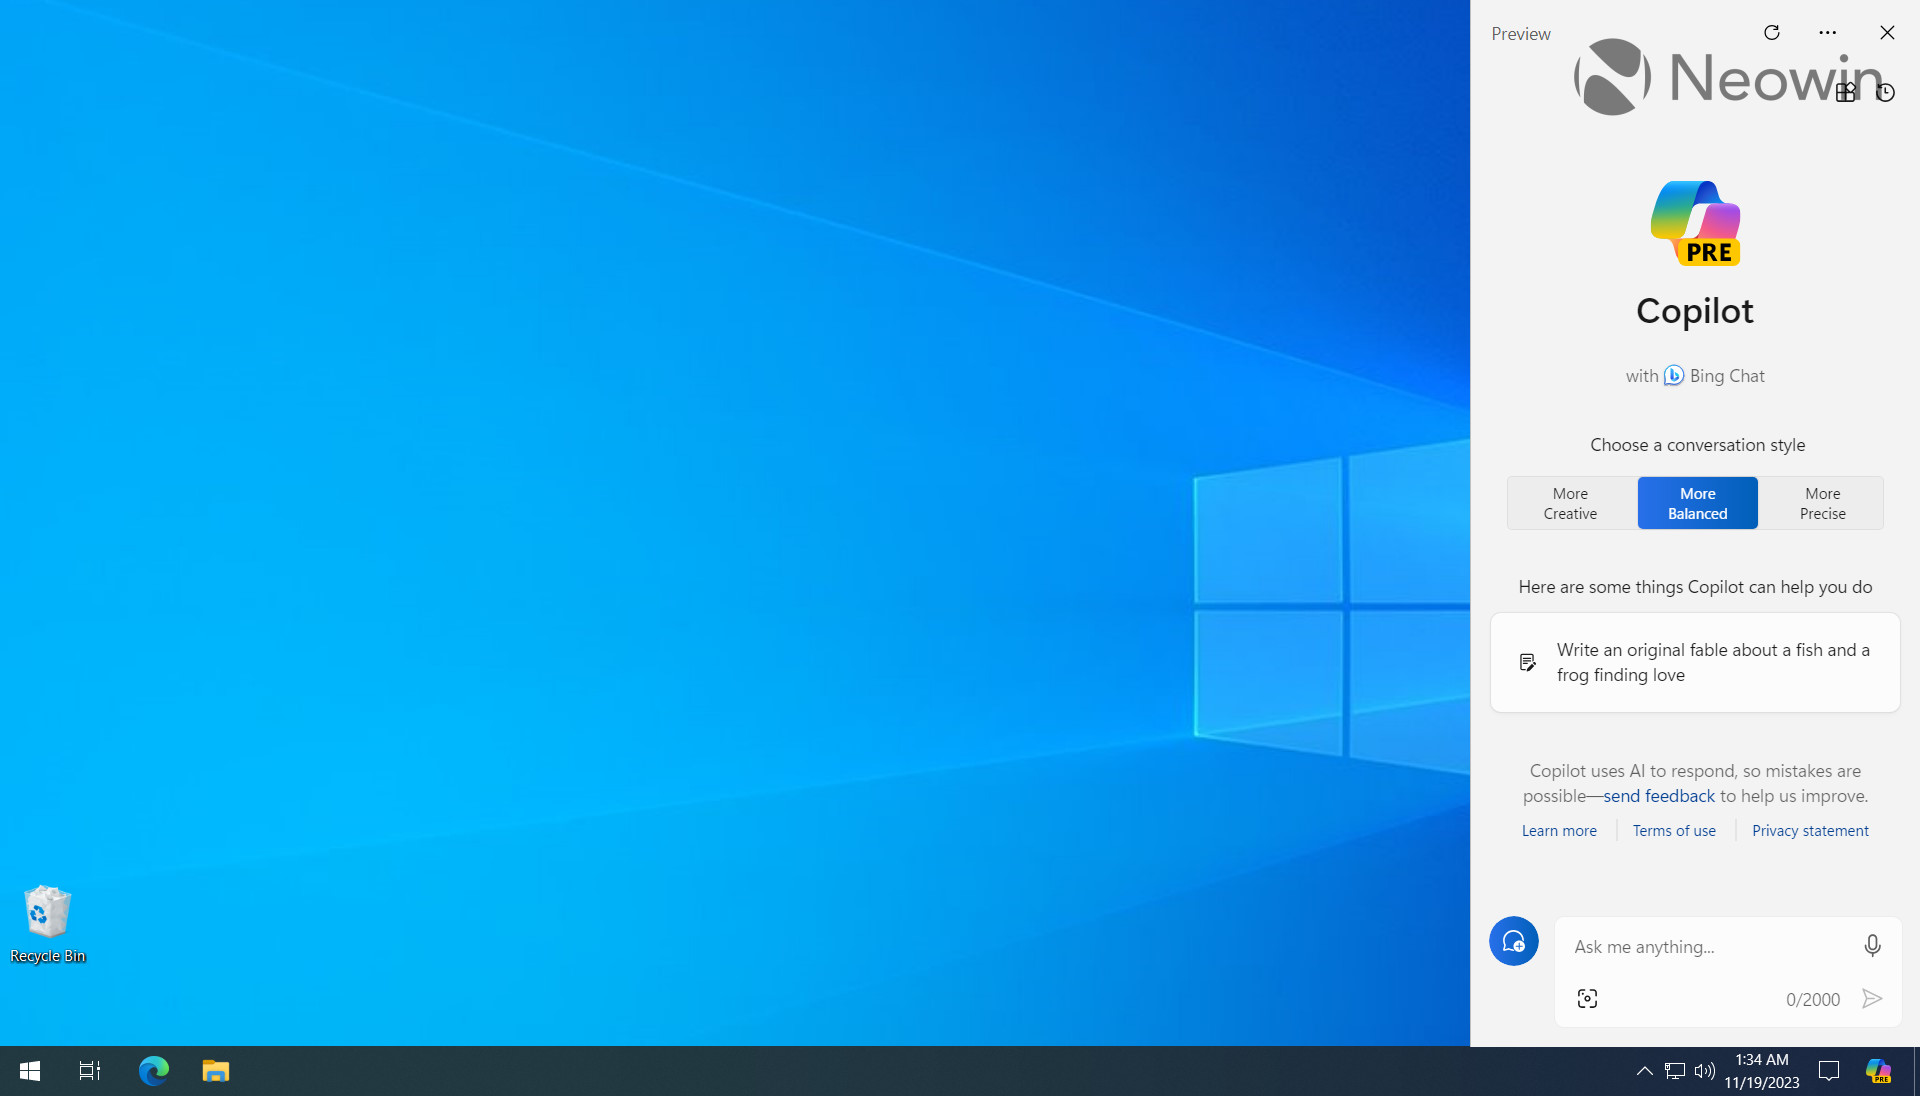
Note: turning on Copilot on Windows 10 requires enlisting in the Windows Insiders Program, modifying the system registry, and tweaking the OS with a third-party app. Do not proceed if you do not want to risk encountering bugs or instabilities or if you are not comfortable with in-depth modifications. Although Windows 10 is a mature and stable OS and Release Preview updates rarely break things, you better be safe than sorry. Also, always back up important data before any experiments.
How to enable Copilot on Windows 10?
- Download and install Windows 10 build 19045.3754 or newer. By the time of writing this guide, build 19045.3754 is only available in the Release Preview Channel. However, it should not take too long for Microsoft to release it to all Windows 10 users.
- Update Microsoft Edge to the latest version. Go to edge://settings/help and install available updates.
- Download ViVeTool from GitHub and extract the archive in a convenient folder.
- Open Command Prompt as Administrator and navigate to the folder with ViVeTool files using the CD command. Here is an example: CD C:\Vive.
- Type vivetool /enable /id:46686174,47530616,44755019 and press Enter.
- Restart your computer.
- Press Win + R and type regedit to launch Windows Registry Editor.
- Navigate to Computer\HKEY_CURRENT_USER\SOFTWARE\Microsoft\Windows\Shell\Copilot\BingChat and double-click the IsUserEligible value.
- Change its value data from 0 to 1. Note: you must sign into Windows with your Microsoft Account; otherwise, the value will reset from 1 to 0 upon each system restart.

- Restart your computer.
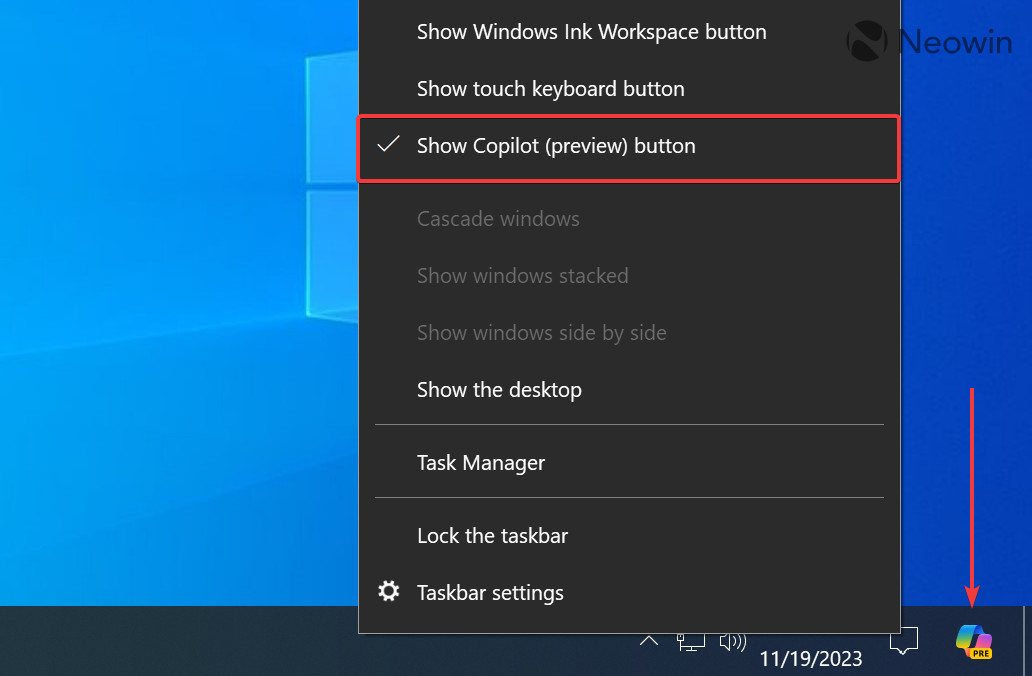
- Right-click the taskbar and select "Show Copilot (preview) button." The Copilot icon will then appear to the right of the notification center button. Note: you will not see the icon if you have the taskbar on the right or left side of the screen.
Windows 10 users, do you plan to use Copilot on your systems? Let us know in the comments.






6 Comments - Add comment