Windows 11's Microsoft Store has many games and extras you can purchase or download with PC Game Pass. However, deleting the downloaded content may look slightly confusing since the Store has no apparent "Uninstall" button (it is a feature many users plead Microsoft to add). Here is how to uninstall a DLC downloaded from the Microsoft Store for whatever reasons you may have.
Uninstall Microsoft Store DLC in Windows 11
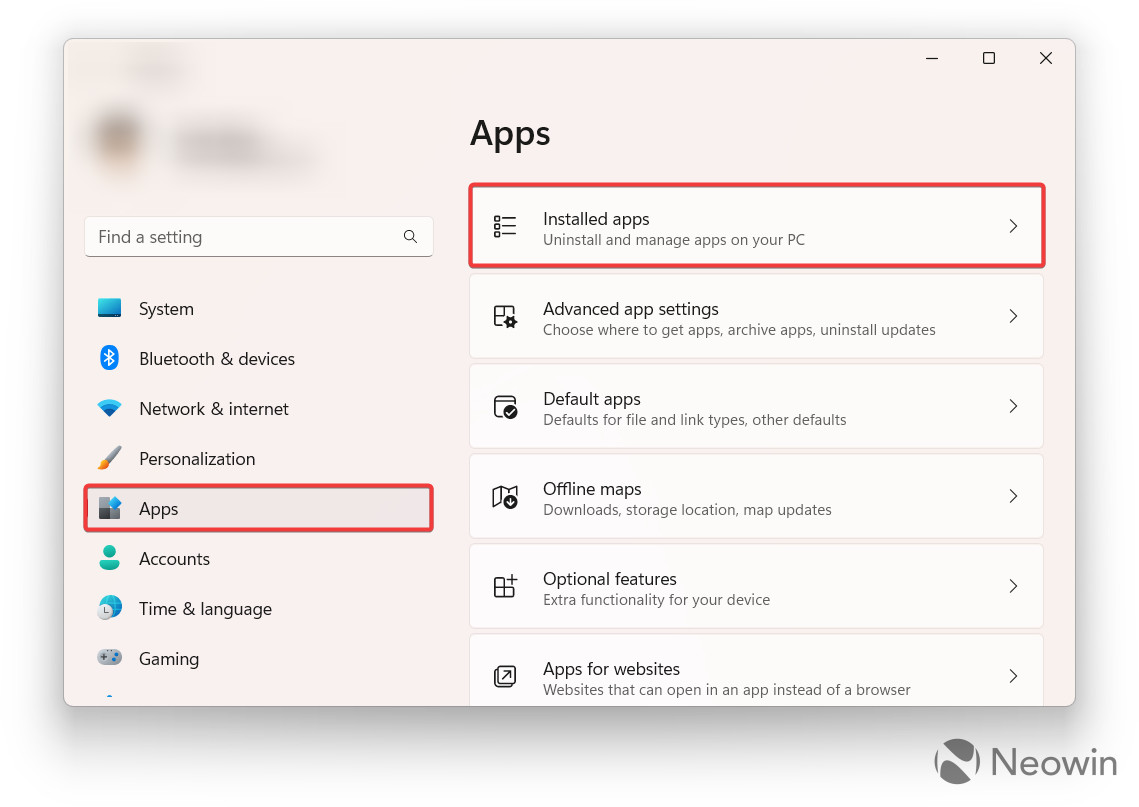
- Launch the Settings app by pressing Win + I or another method you prefer. You can also right-click the Start menu and select "Settings." Alternatively, press Win + R and type "ms-settings:appsfeatures-app" without quotation marks. The command will get you directly to the list of installed apps on your system.
- In the Settings app, go to Apps > Installed apps.

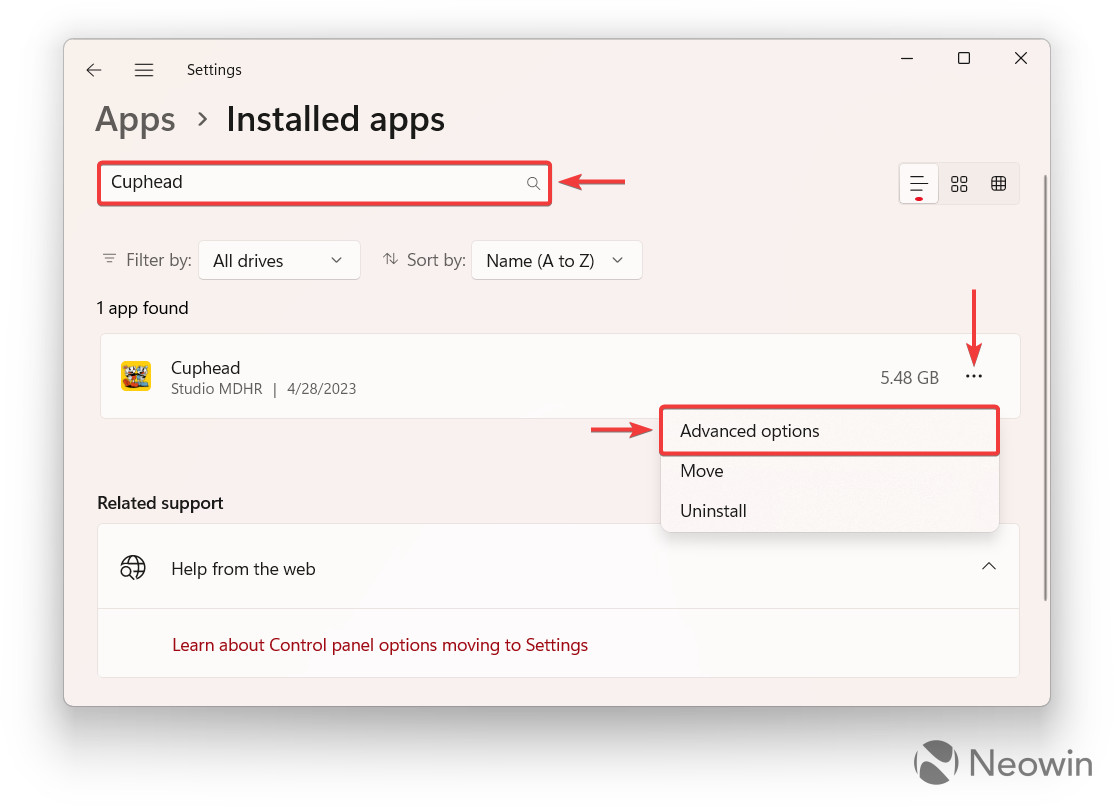
- Find the app which DLC you want to uninstall. Another option is to click the search bar and type the DLC's name.
- Click the three-dots button next to your game. Select "Advanced options."

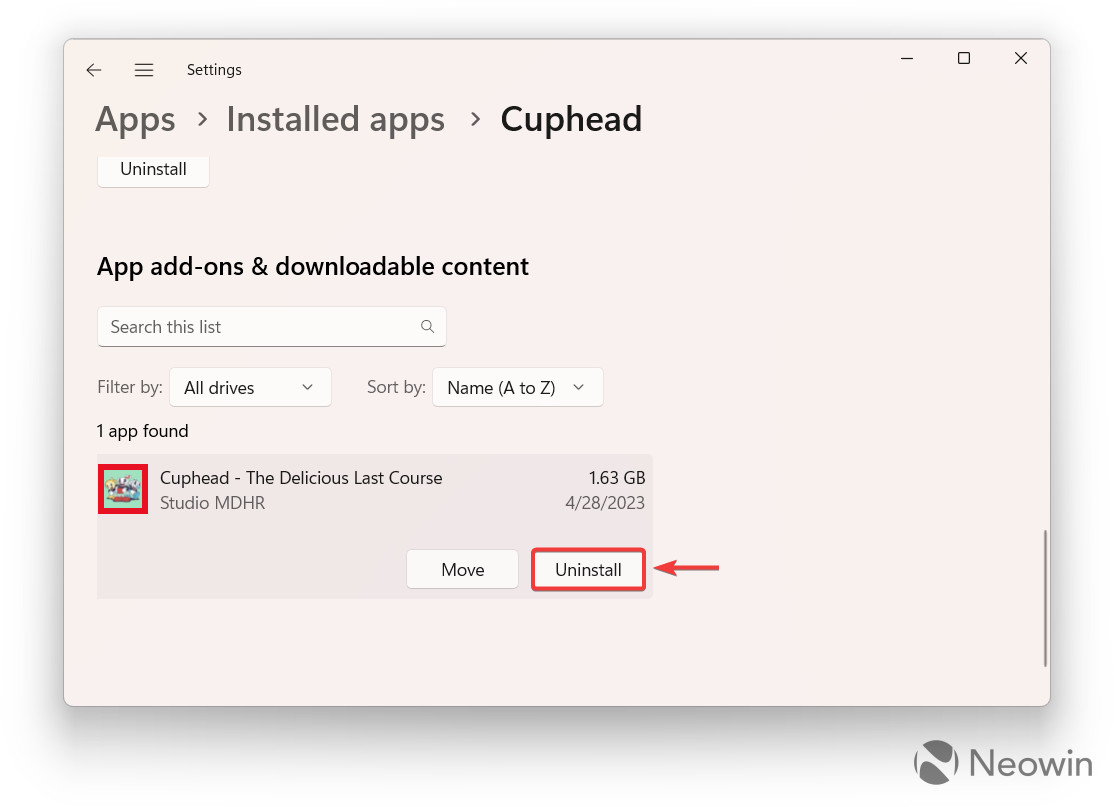
- Scroll down on the next screen and find the "App add-ons & downloadable content" section. Here you can uninstall game DLCs downloaded from the Microsoft Store. If the game has a lot of additional content, use the search bar or sort the list with filters, such as drive, name, size, and install date.
- Click the DLC you want to uninstall and then press the Uninstall button.

- Wait for Windows 11 to remove the selected content. Note that the process will take some time, depending on your computer's speed or DLC's size.
Note that some apps have built-in stores and repositories for managing downloadable content. Usually, those do not appear in the Settings app, like DLCs from Minecraft's Marketplace. Therefore, to uninstall such a DLC, check the corresponding section inside the specific game.


1 Comment - Add comment