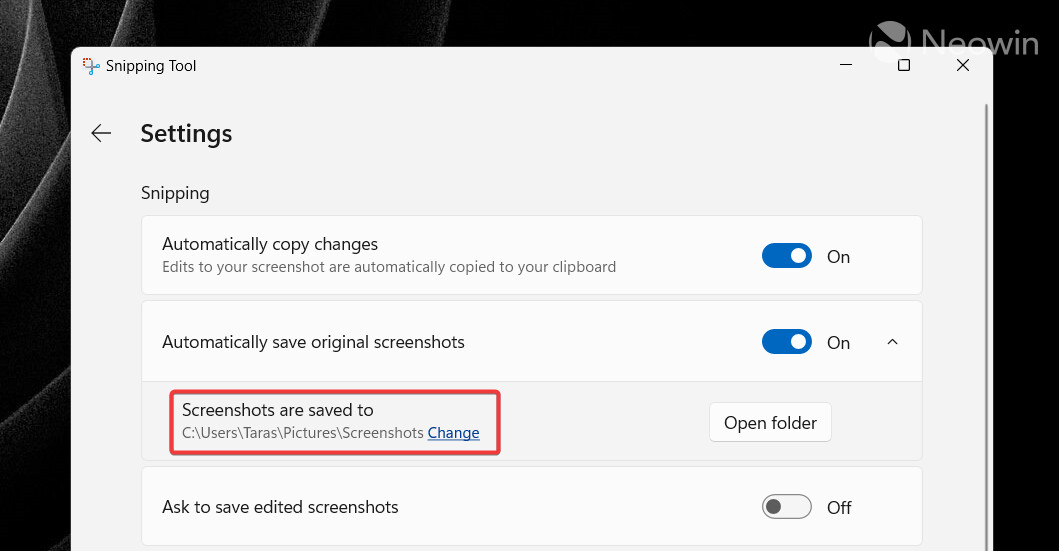
Windows 11's default screenshot utility is a pretty handy and feature-packed app, but it lacks one critical thing: the ability to change the default screenshot folder. While it is technically possible with some registry hackery, the app does not offer a user-friendly option to specify where the app should store screengrabs. That, fortunately, is finally changing.
Alongside the two new Windows 11 preview builds announced for Dev and Beta Channels earlier this week, Microsoft released a new version of the Snipping Tool app. Version 11.2408.13.0's main highlight is the option to change the default folder for screenshots and screen recordings.
We are rolling out an update for Snipping Tool (version 11.2408.13.0 and newer) to Windows Insiders in the Canary and Dev Channels that introduces the ability to change the folder that original screenshots and screen recordings are automatically saved to. Just go to app settings in Snipping Tool to select a new default folder to try it out!

Although the update is technically only available to Windows Insiders, you can get to version 11.2408.13.0 without waiting for the public release or enrolling your device in the preview program. Just keep in mind that the update is a preview, so it might be less stable than the public version.
- Go to store.rg-adguard.com and select ProductID from the first drop-down list.
- Paste 9MZ95KL8MR0L in the search box.
- Select Fast from the next drop-down.
- Download the Microsoft.ScreenSketch_2022.2408.13.0_neutral_~_8wekyb3d8bbwe.msixbundle file (you can also download a newer version if there is one).
- Run the downloaded file and click Update to install the new version.
Now, open the Snipping Tool app, go to Settings and expand the "Automatically save original screenshots" option. Click Change to specify a new folder for screenshots and screen recordings. If something goes wrong, uninstall the Snipping Tool and download the latest production version from the Microsoft Store.


4 Comments - Add comment