Introduction
In 2014, LG released the world's first 34-inch ultrawide monitors, the 34UM95 and 34UM95-P. I managed to get my hands on one very early thanks to snapping up a release through LG Germany. it felt great to finally have a large monitor with healthy specs, for the time, and to be on the cutting edge of monitor tech with an IPS panel, 60Hz, an internal lookup table (LUT) for hardware calibration, excellent viewing angles, and various connection options. But it was an LCD display with an LED backlight and a matte anti-glare coating, and with that came the usual flaws that all LCD panels suffer to this day: crushed/washy black tones, backlight bleed, and a diffused reflection from light sources that ends up being a distraction causing difficulty in seeing screen content in strong lighting.
Back then, we were still dreaming of the day of being able to enjoy a computer monitor that displayed true black, just like high-end CRTs used to, with specs that meant gaming and productivity could get equal screen time. Well, today is that day, because Dell Alienware has released the AW3423DW a QD-OLED 34 inch ultrawide monitor with some impressive specs, and a price that many could not believe.

QD-OLED differs from normal OLED in several ways. Standard OLED panels produce white light as a starting point. This is done using blue and yellow OLED material that passes through a colour filter to separate out the colour spectrum. Because a filter is used, brightness is compromised. It works in this way for cost effectiveness. Samsung, at one point, did try using RGB material for this but the complexities involved meant the costs were too high, especially for TVs that are commonly 50" and above.
QD-OLED is much simpler than an LCD panel, it combines the best of standard W-OLED and Samsung's Quantum Dot technology by using a blue layer of OLED material which then passes through a Quantum Dot sub-pixel layer. The blue pixel is divided into sub-pixels consisting of the remaining red and green. Because there is no colour filter involved in this process, the OLED material can emit brighter light as a result.
Samsung say that the stability of each pixel is greatly increased as well. The other benefit here is that in the long run, QD-OLED panels should cost less than normal OLED thanks to needing less material and less complexity at the manufacturing stage. If the AW3423DW's RRP is anything to go by, then this is a good sign.
As with all my reviews, this will be based on real-world usage. I am sharing the experience and knowledge of QD-OLED gained from the time I took delivery on the 23rd March, to the time of writing this piece.
I have already built a mental list of things I like and don't like about this display, and for the sake of full transparency, this is a monitor I purchased for myself to replace the LG 34UM95-P.
Dell is offering three years of warranty, which includes OLED burn-in. This should, in theory, inspire confidence in QD-OLED technology, since no other brand has such a panel on the market, so nobody really knows how good they are for longevity. Dell and Alienware reps had previously claimed that QD-OLED lasts longer than standard OLED, and that burn-in resilience is higher because of this technology.
I originally pre-ordered this monitor at Dell UK's special promotional rate, £1099. I then applied a workplace perks voucher code which shaved off 20%, along with £100 cashback through my credit card company's offer scheme for purchasing a Dell product. Finally, because I clicked through via Quidco, I earned a further £30 cashback. The grand total coming in at under £750. Some folks were able to get it as low as £650 by stacking various other codes at checkout, those lucky sods.
At the time of writing, the AW3423DW is still £1099 / $1299. You can still also apply a Dell discount code to get, at the minimum, 15% off your order whether you are a student or work with a company that offers retail perks.
Either way, the whole world expected a price around £2000 given the leaked specs and the fact that other high end OLED monitors such as LG's Ultrafine range already cost thousands. Granted, they are aimed squarely at professionals, and with that comes a hefty price tag, but this QD-OLED panel also supports a wider colour gamut and is also a 10-bit display capable of over a billion colours.
Specifications
| Screen size | 34" Ultrawide (34.18" viewable size) |
| Resolution |
3440x1440 (3600x1543 accounting for Pixel Shifting), 110 PPI |
| Panel technology | QD-OLED |
| Refresh rate | 175Hz (8 bit), 144Hz (8, 10 bit), 120 Hz, 100Hz, 60Hz |
| Variable Refresh rate | Nvidia G-Sync Ultimate |
| Brightness | 1000 cd/m2 |
| Contrast ratio | 1000000:1 / 1000000:1 (dynamic) |
| Screen curvature | 1800R |
| Colour gamut | 99.3% DCI-P3, 149% sRGB |
| Input | 2x HDMI 2.0, DisplayPort 1.4 |
| Output | Headphone jack, audio line-out, 4x USB 3.2 gen 1, |
| Response time | 0.1 ms (grey-to-grey) |
| Anti-reflective coating | Yes, red tinted glossy finish |
| Dimensions | 81.525 cm x 30.571 cm x 52.527 cm |
| Power consumption | 42.3 W |
| Price | £1099 / $1299 |
First impressions
Like with many things in life, first impressions count. I was surprised by the packaging situation with this monitor. Other monitors I have taken delivery of came in boxes with internal foam sheets and panels that gently protected the monitors. Dell has opted for rough edged cardboard panels for this, and the front of the monitor itself is protected by a bubble sheet layer that appears to press against the AG coating during transit due to the way the box internal panels press against the display.

This ultimately led to some marks on my panel in a pattern that was exactly matching the bubble wrap sheet. Others online confirmed that they too saw similar marks, with some being able to remove them with a little bit of Isopropyl alcohol applied to a soft cloth. I was less lucky in that the marks seemed more stubborn.
I raised a ticket with Dell and once someone had picked it up on the system, a new monitor replacement was in my hands within 48 hours with no marks on the panel. Excellent turnaround - Although I must add that others on the Overclockers UK forums who contacted Dell support about their monitors with a few issues were less lucky than me and were given the run-around by Dell's support. Some work needs to be done by Dell to make the support experience a consistent affair.
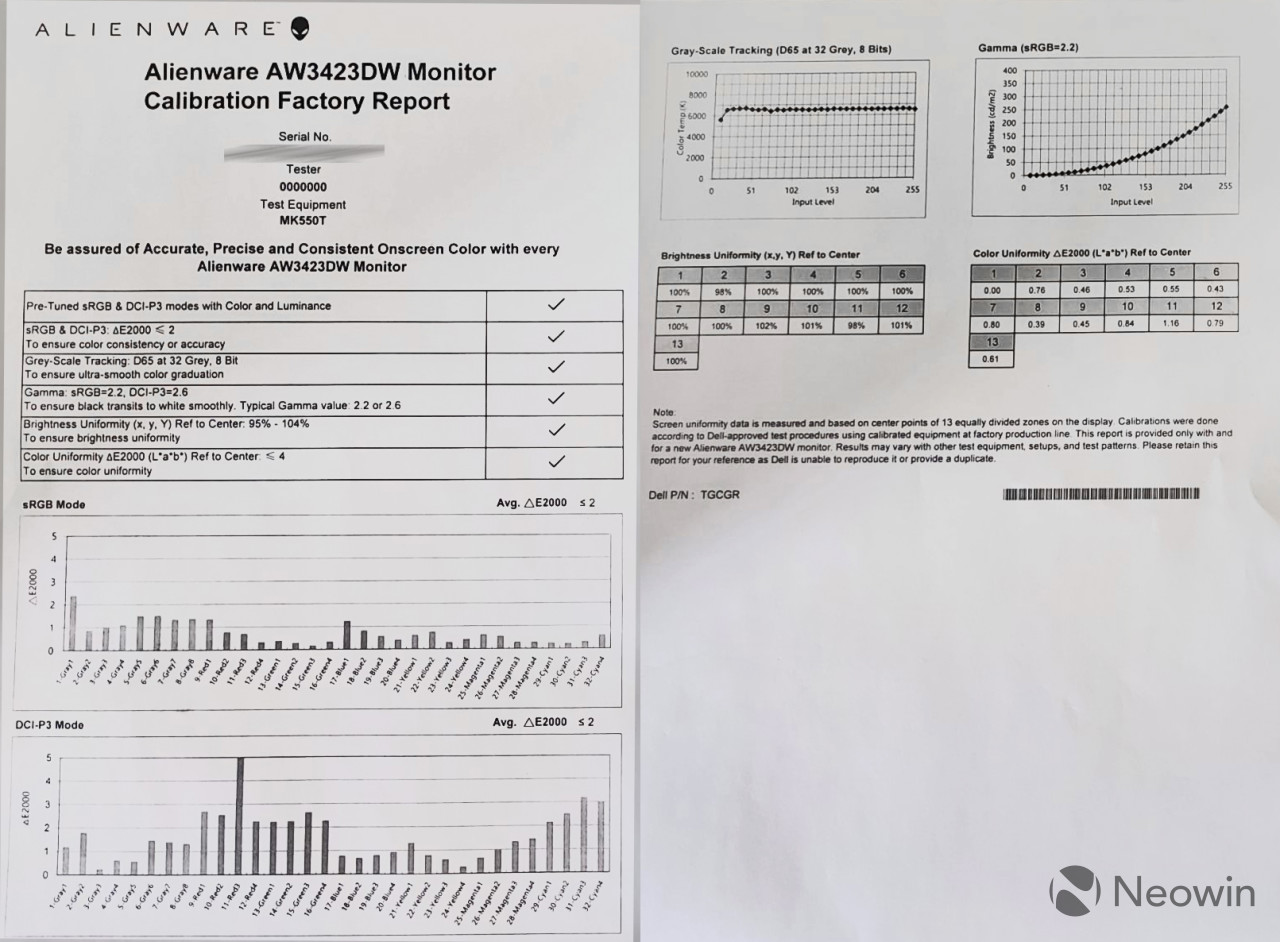
Dell includes a factory calibration test sheet with every panel. As you can see, both grey and colour deltas are very respectable and at a level for sRGB that I would be fine to edit my photographs with. More on this later though, as to get to this output requires a few steps in the OSD.
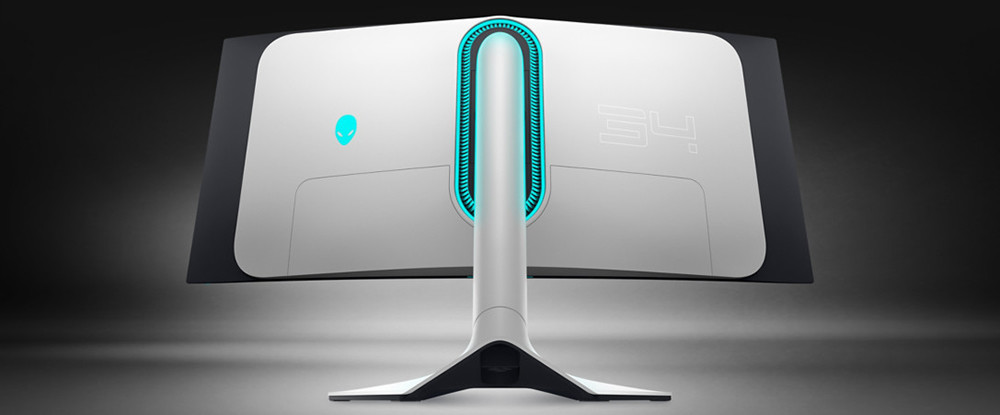
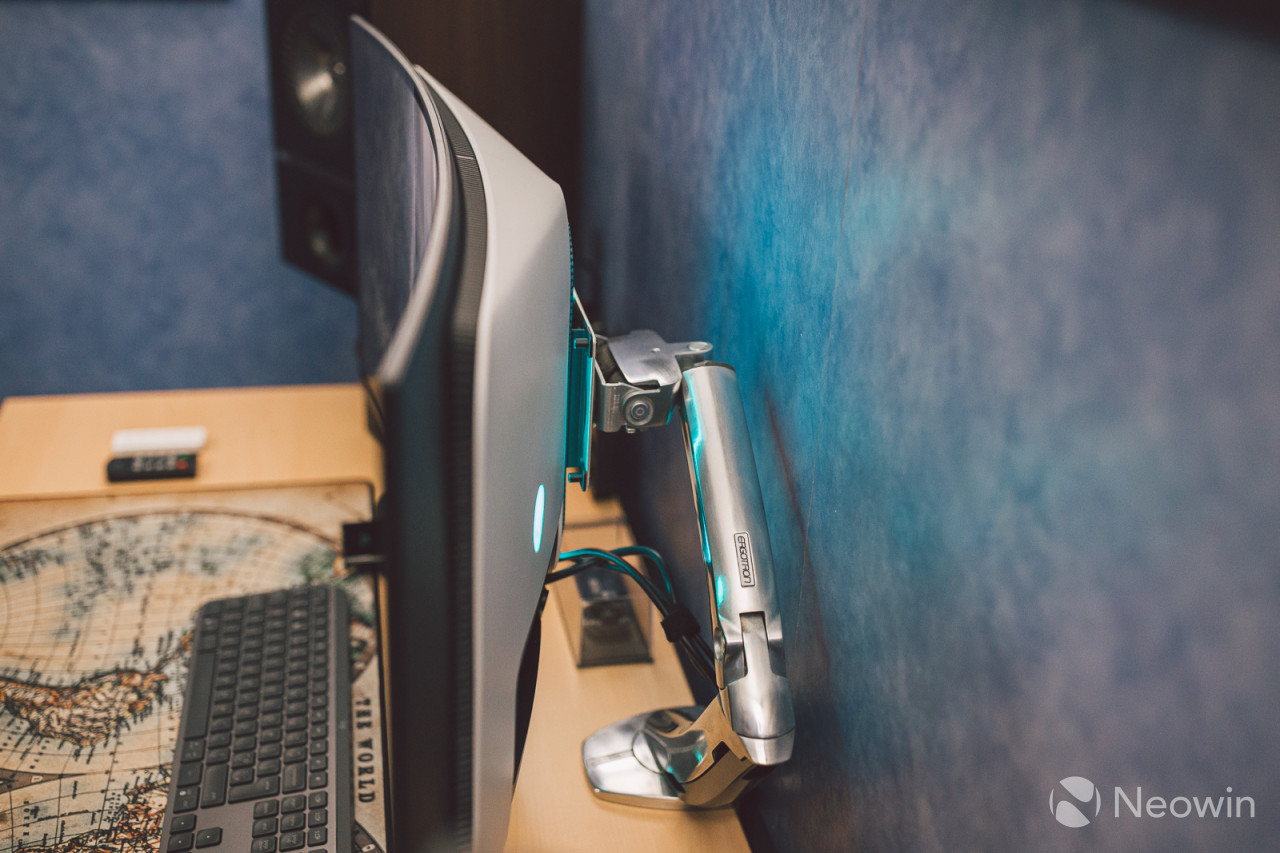
As you can probably tell from the stock images at the start of the review, the stand that ships with this monitor is quite bulky. It is a good quality stand but takes up a lot of space. I don't really like it either and opted to install the AW on my old (but gold) Ergotron MX. Dell includes a hefty VESA 100x100 adapter for this which is excellent to see.
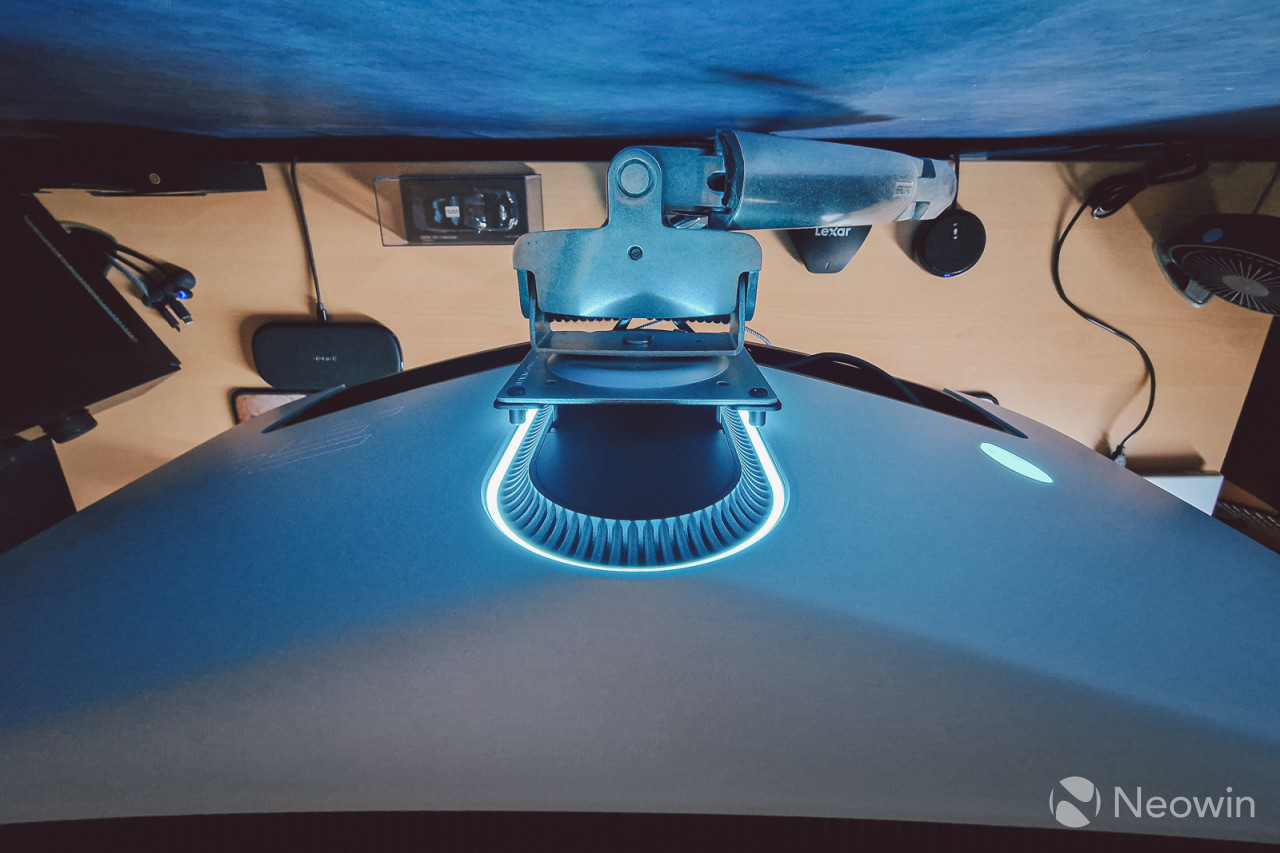
By default, the RGB lighting was quite offensive to my eyes. As you may have guessed, I'm not an RGB kind of guy, so I opted to leave these all off for my normal usage, but for the sake of pretty pictures, left them on. All the lighting features can be controlled from the OSD without having to install the Alienware Command software.
Dell has opted for a joystick style button below the bezel for almost all functions. The power button remains on the bottom right of the bezel however.This is nice to see and brings things up to modern standards as other brands have had joystick OSD navigation for some years now. I am pleased to report that the response of the joystick and onscreen menus is instant. It is a little thing to note that might not seem like much, but it does improve the overall user experience.
I also discovered that the area at the bottom that Dell calls the downlights, is also a touch-sensitive bar that turns the downlight on and off. Sadly, the brightness of this cannot be adjusted and I found it too dim to be useful in the dark which is a shame, as it could have saved some battery juice on the MX Keys in the dark!
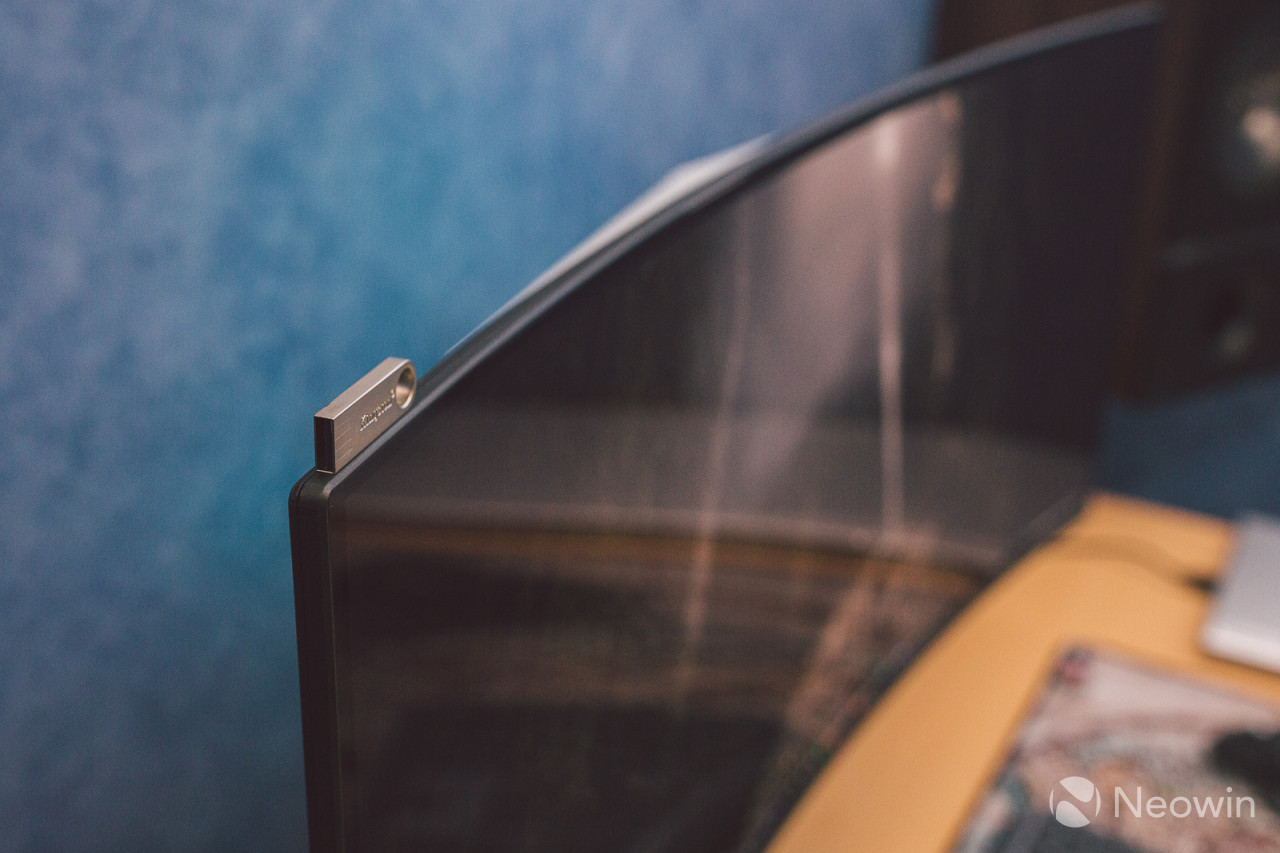
The thickness of the panel itself is just a bit more than a USB stick which looks really cool in the flesh. The bulkier parts of the back panel house the power components and input jacks, as well as the G-sync module and fans. Overall, a very nice design from the Alienware folks.
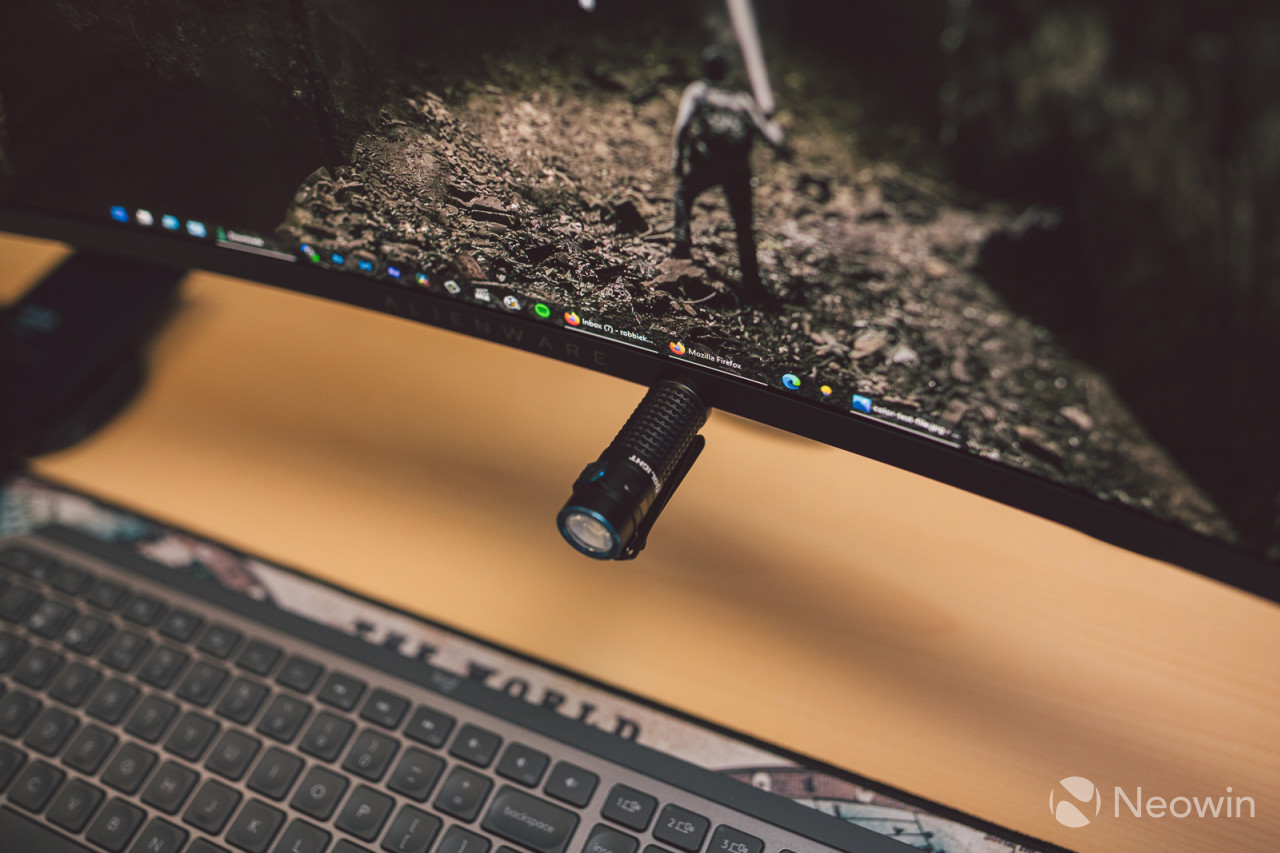
The bottom bezel trim is also metal/steel, not plastic like I first assumed. This was a surprise and quite cool, literally. In the morning when I turn it on and touch the bezel, it is cold to the touch. You can even stick fridge magnets on it for novelty.... I need to find some geeky fridge magnets now.
Productivity performance
Some online reviews have said that this monitor probably isn't ideal for productivity work because the text fringe issue on QD-OLED may be a distraction, and that when bright light is in the room, the black shade quality turns to pot. This has resulted in people on forums and Reddit subs going a bit bonkers, which as an owner is quite frustrating since my experience as an actual user is quite the opposite, which has then been complimented by other owners ushering in the same experience as myself.
As you can see, black level performance with direct sunlight hitting my desk from an open window is not really an issue, and the AG coating on that glossy front is doing a nice job.
Yes, there are a few things that should be done to get the best out of QD-OLED first. For text, setting up ClearType on Windows is important to reduce the noticeable effect of text fringe. This only takes a minute to do.
Secondly, I recommend letting the screen fully warm up first. These are organic materials emitting light, it takes about 30 minutes to reach a nominal temperature and optimum performance. Colour calibration device makers even recommend this in their software documentation before running a calibration session for OLED displays.
Other comments complained about flickering at 175Hz, this is a fair one as some people are sensitive to flicker and it has been suggested that switching to 144Hz solves it. My experience is that I was able to produce flickering at 175Hz when in Photoshop editing a black and white photo and then zooming in and out of the image.
I would also recommend removing the Dell supplied icc colour profile that installs itself into Windows if you install the monitor driver. By having it active, you end up losing colour fidelity in various applications which may not be obvious at first but when you are looking for inconsistencies like this, it becomes apparent something is off. As we are working in sRGB, every application should be displaying the same colour tones when the same image is opened. By removing the icc profile and leaving that window blank (see screenshot below), every application will default to sRGB which is the standard colour gamut used on pretty much everything outside of a professional editing and mastering environment.
Changing to 144Hz completely solved this. Your mileage may be different, of course. At 144Hz, you also have the option of using 10-bit colour compared to the default 8-bit. On a modern Nvidia and AMD system, 8-bit will be dithered anyway resulting in excellent dynamic range and banding control. In almost all cases, you will find that native 10-bit vs 8-bit+ dithered is indistinguishable from each other. I have yet to see anyone being able to tell a difference. But because I am at 144Hz, it only feels natural to choose the higher colour mode, so 10-bit it is.
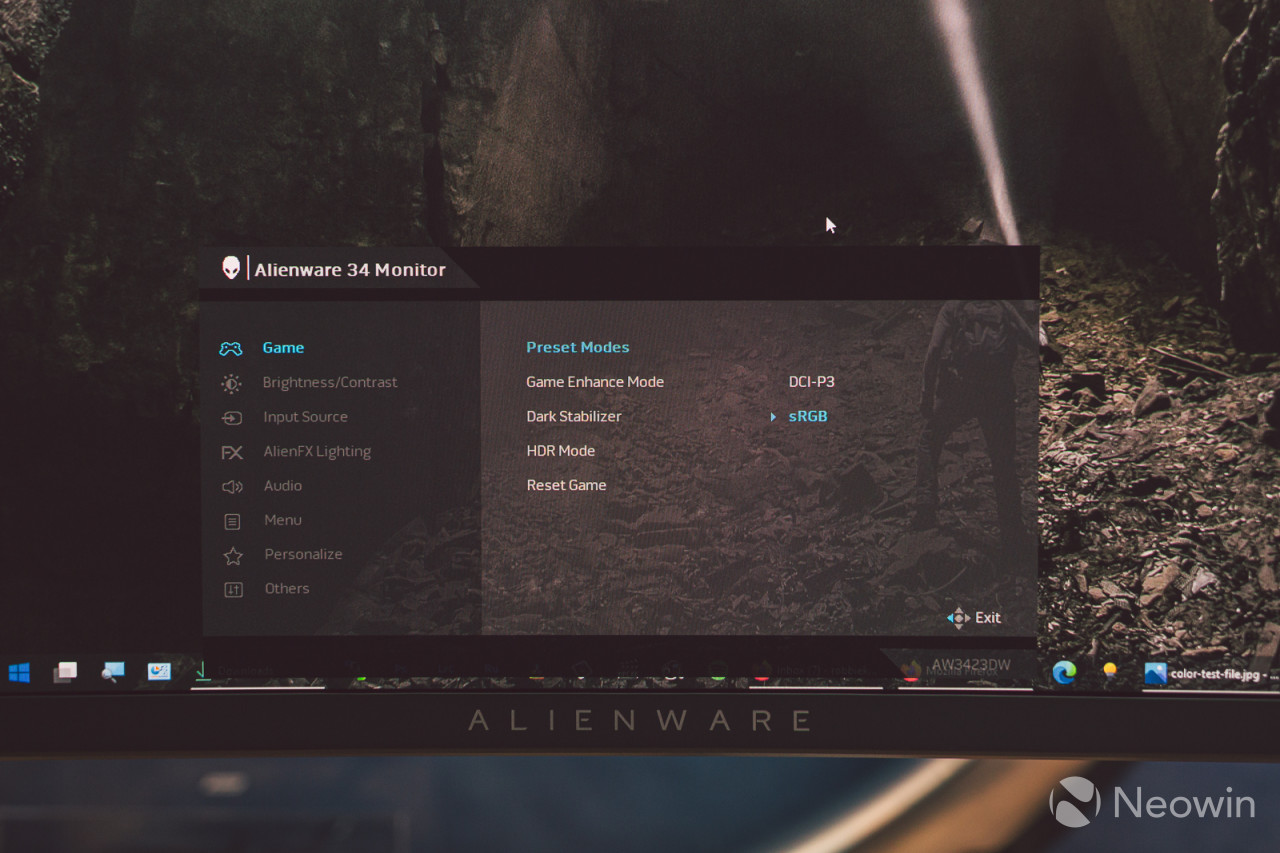
I also adjusted the OSD to be in Creator mode, colour in this mode is set to sRGB (the default is DCI-P3), and the gamma value was changed to 2.4. The brightness and contrast were then set to 52 and 66 respectively. The brightness at 52 also equates to around 100 nits, which I found to be more than ample for daytime use even with windows open.
White pages appear like paper white, which is ideal for reducing eye fatigue, and in dimmer conditions your eyes will be better for it. If this is the first time you are using any OLED with this brightness, then it may feel like it is too dim, but you soon get used to it.
All these changes resulted in a near visual 1:1 match to my LG 34UM95-P which was regularly hardware calibrated to 100cd/m2 and 6500K with an sRGB working colour space.
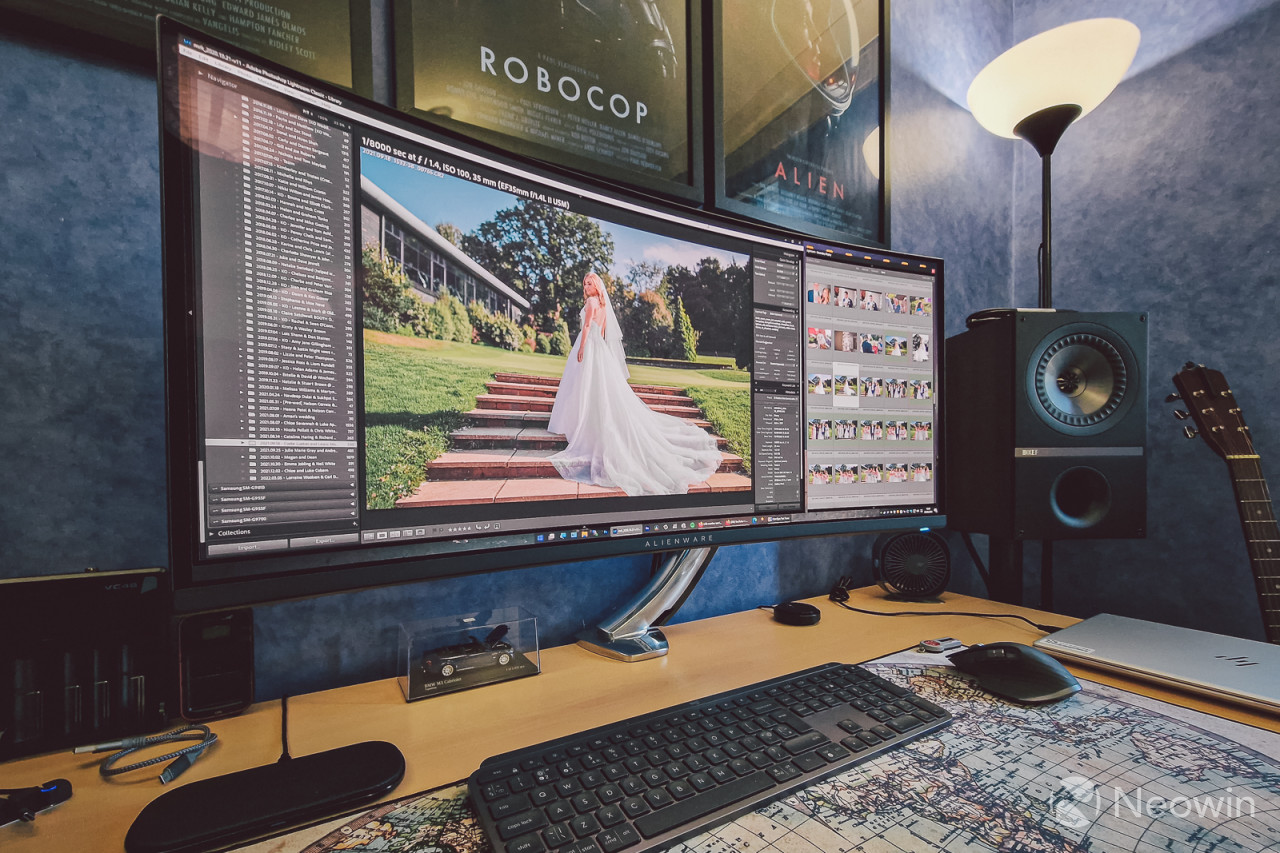
As you can see, productivity has been a breeze, all it takes is to sit down and set a few things up. With regards to the glare comments in indoor lighting, the above photo is with my room lights on and you can make out the ceiling light on the left top corner of the panel, but the contents onscreen are still clearly visible and legible.
With a matte IPS display, this area would be diffused with a whitish glow from the light being spread over a large area resulting in difficulty in reading the content on-screen.
Gaming performance
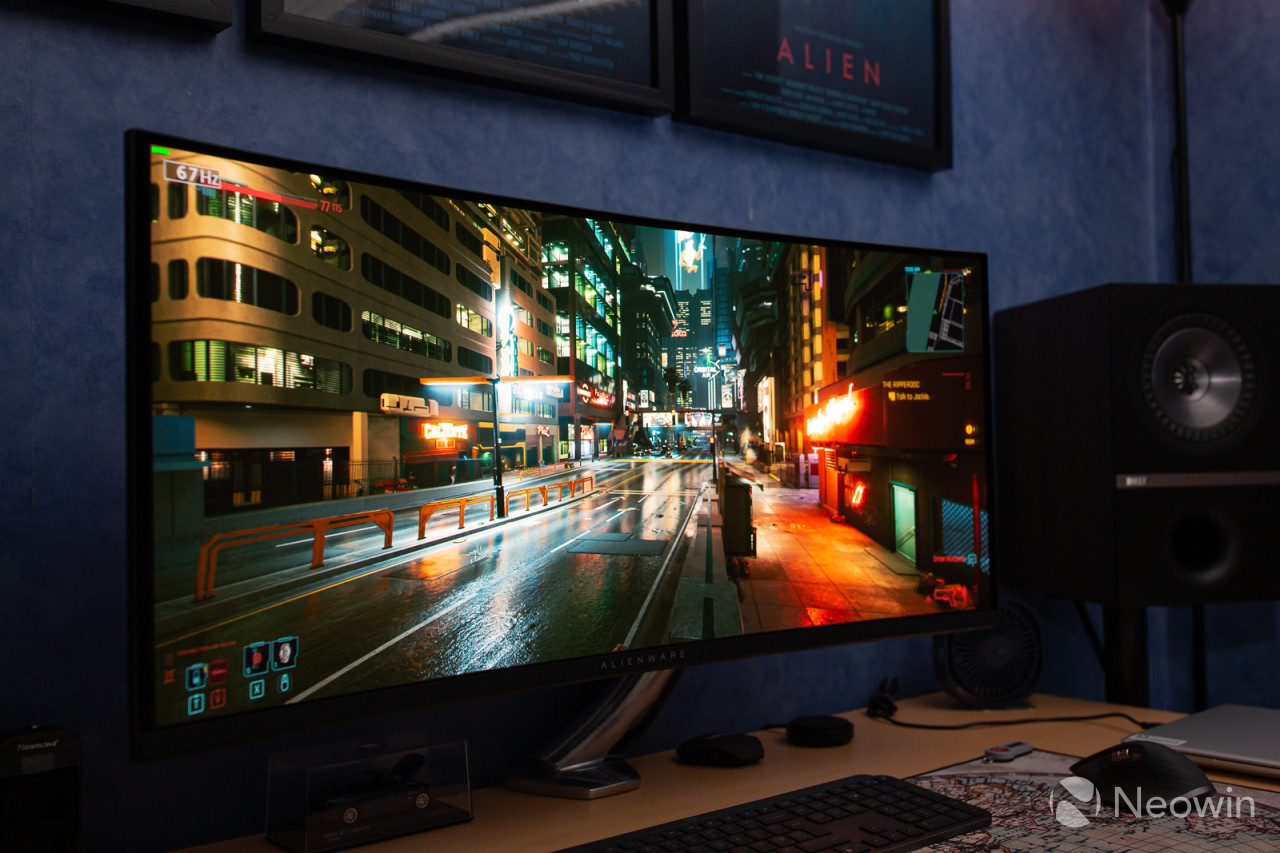
I only have a handful of games installed, but the one I found the most improved by QD-OLED is Cyberpunk 2077. A city built around a neon aesthetic is only going to look amazing on this. If you are intending to get one of these, then I recommend setting the HDR mode in the OSD to Peak 1000, and then increase the HDR luminance slider in the game's HDR settings screen to 1000 as well, because the default value is 250-400 if I recall, which is too low and will not make the most of those 1000 nits of brightness available.
The punchy contrast colours and rich black shades really do give a new dimension to this game. The city feels like a movie scene, and I find myself just walking around aimlessly looking up at lights and stuff. An absolute showcase for a combination of RTX, HDR, and OLED quality.
I found that games like this running with G-sync Ultimate feel far beyond that refresh rate. I am able to maintain 60+ fps with maximum settings, yet throughout I keep feeling as if it felt close to 100fps purely because the latency and responsiveness and motion of OLED is so good for gaming, and coupled with the G-sync module, just tops off the overall experience.
I also played some God of War, it looked equally great, but because of its art style, the effects of HDR felt less impressive. This game looks stunning in non-HDR mode anyway thanks to the clarity QD-OLED brings to all games, and those dark areas shine (well, you know what I mean).
Playing Counterstrike: Source on this was enjoyable, too. It may not be a graphically impressive title like modern games, but the sheer performance now possible for me having come from a 60Hz IPS meant I was reacting quicker, and the mouse movement felt much more responsive too. My hit rate improved as a result, and I could actually keep up with others on a server. I kept the screen at 144Hz and let G-sync do its thing.
Media playback
Another area where one review by HDTV Test stated that this probably wasn't a good display for movies has to be addressed. Vincent in that review said this because 4K/Blu-Ray movies plant a centralised movie frame leaving both letterbox and pillar boxes around the screen resulting in a small movie crop.
This is only an issue if you connect a Blu-Ray player to the HDMI port and watch content that way. Playing a movie via a PC is a complete non-issue and any movie that has been encoded with forced letterboxes can easily be worked around by simply adjusting the scaling in whatever media player is being used. I use MPC-BE, for example, and pressing the numpad keys adjusts the scaling of the movie frame.
With browser-based streaming services, you just install an extension like Ultrawideo which is available for the most popular browsers. All it then takes is a quick key press to switch between scaled 21:9 and 16:9
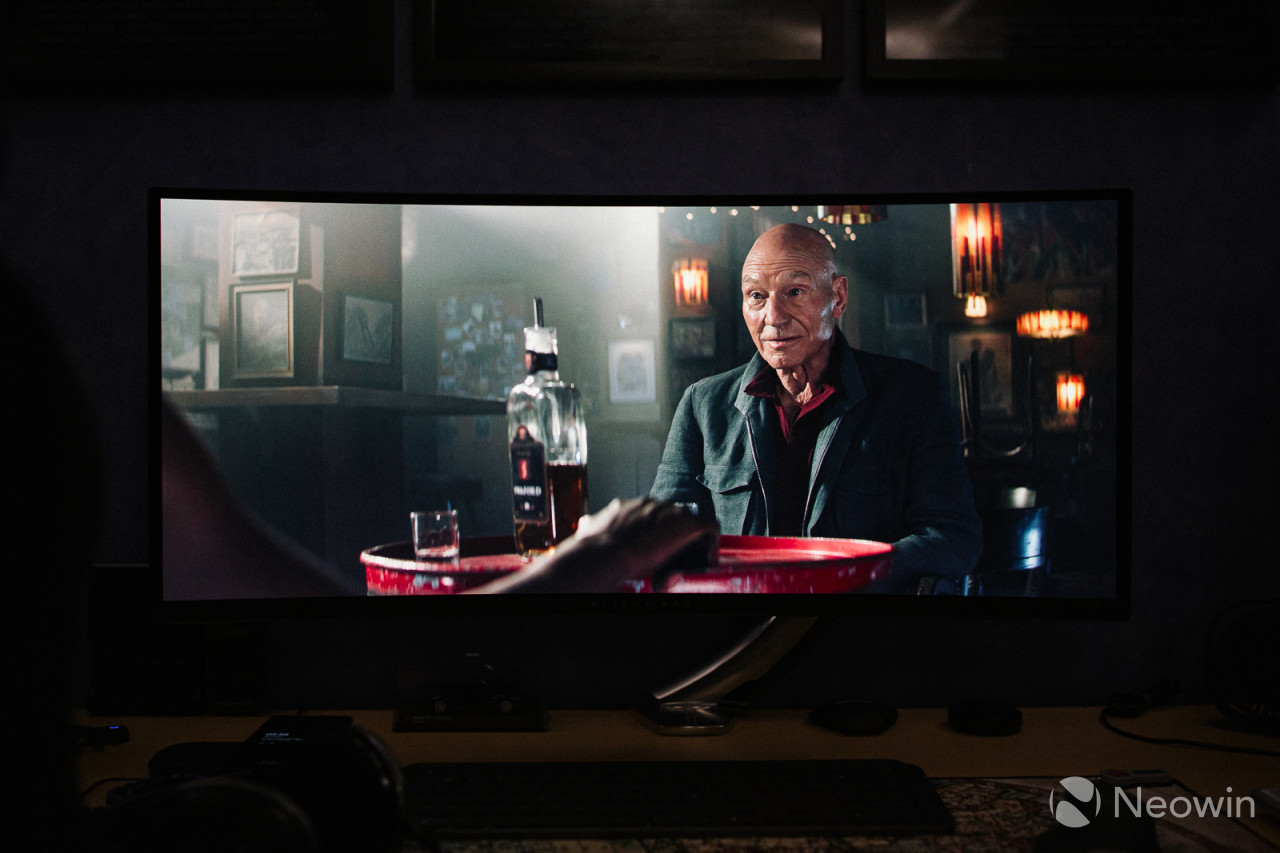
Nightmare Alley is a recent movie which features many dark and contrasty scenes. Scenes that are not that enjoyable on an LCD based display because those dark areas look grey. It looks phenomenal on the QD-OLED however, especially in HDR. Speaking of which, watching movies in HDR on this is super easy. The AW3423DW has Smart HDR, so when a HDR signal is sent to it, it will switch to HDR mode and Windows will also activate HDR mode.
In MPC-BE I am using the MPC Video Renderer which has the option to send the HDR signal directly to the display:

Observations
There are two fans! One is in the middle of the back panel somewhere, and you can feel the airflow if you place your hand over the top vents in the middle. The other is on the left side where I assume is the G-sync module. This fan is the audible one of the two as it is always running, even in standby mode. It sounds like a faint hum at first but will vary in pitch depending on activity and temperature, it seems. It is not annoyingly loud and is audible to me due to having an extremely quiet PC that is near enough passive in noise levels.
The central fan only spools up every so often and, audibly, is like a whooshing of air. Here is a video to try to show what they sound like; you may need to increase your volume.
Eco Mode in the OSD appears to not really do anything. The user guide states that turning it off simply stops it going into standby mode, so I tried it on Windows 11 and saw that when the display is set to go to sleep, it goes to sleep with or without Eco mode.
The power LED also functions as a status indicator. As this is an OLED display, it has a several features to prolong OLED pixel life. Two of these are OLED burn-in protection cycles called Pixel Refresh and Panel Refresh. Pixel Refresh will activate every four hours via a screen prompt and the cycle takes seven minutes to complete. You can skip each prompt or choose not to show the message again. If you do this then the Pixel Refresh cycle will run when the screen enters standby, or you press the power button. The power LED will pulse green during a Pixel Refresh.

Panel Refresh will activate the same way, but every 1500 hours according to the user manual. A red pulsing LED will confirm that it is active. A Panel Refresh takes one hour to complete. Both maintenance cycles can be activated from within the OSD menu if one gets skipped when it is due., and unlike Sony/LG, Dell currently does not give any caution on over-using the manual Panel Refresh option in the OSD which has caused some debate on Reddit whether it is safe to use before the 1500 hours have elapsed.
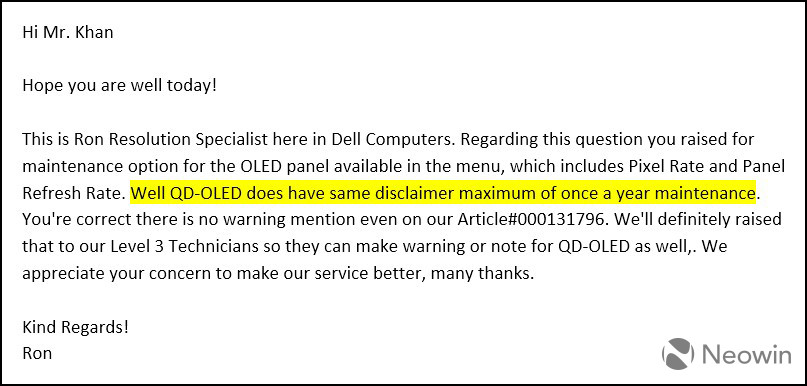
I reached out to Dell for clarification on Panel Refresh. It does appear that the user manual not giving any warning about its use was an error, and going by what the above email reply says, it does look like Dell will soon update the documentation to clarify this.
Pixel shift/orbit is another feature on the AW3423DW. This is a blank area of pixels surrounding the main active use area that the whole screen will "orbit" to reduce screen burn during active use. You can see this orbit area between the bezel and screen in the above photo. On other OLED displays, the orbit period is approximately every 10 minutes. Sadly, I have no confirmation on how long it is on the AW3423DW.
The four built-in USB ports are version 3.2 gen 1 offering 5Gbps of bandwidth for data transfer. The rear USB ports can also charge phones although there is no documentation confirming what power rates they output. The front ports, however, are very conveniently located. As you can see from the above photo, they are very effective for charging the mouse/keyboard and quickly connecting USB drives and the like.
Whether you mount the AW3423DW on an arm or use the default stand, clearance from the wall behind will still be quite large. Because the back panel curve is quite large, the monitor will stick out once the 1800R curve is factored in. As a result, I found it sticks out more than the much more compact LG 34UM95-P did on the same arm.
The OSD will randomly show that HDR 400 True Black is active even though it is in HDR Peak 1000 mode.
The Creator mode is tucked into the Game Mode parent menu which makes no sense. Creator mode has nothing to do with gaming mode.
The RGB controls are only available in Creator mode, too. This limited the scope of tweaking for specific needs, like wanting to adjust colour balance in another mode. Luckily, the Creator mode offers the best and most natural looking out-of-the-box calibration as shown in the calibration sheet.
The fans do turn off when you press the power button, sometimes... but only after some time. They seems to be oddly regulated. One time I noticed that when I pressed the power button to turn it off, a Pixel refresh cycle started, and the fans were on still. As soon as the Pixel Refresh finished, the fans turned off along with the monitor. Other times the fan was still on when I walked to the PC first thing in the morning, even though the monitor was off and cold.
I have collated a rundown of tweaks and settings for both Windows and the monitor's OSD geared towards an improved user experience. Let me know in the comments if there are others I may have missed, or how you find these!
- OSD: Game mode set to Creator
- OSD: Inside Creator mode, the colour space set to sRGB with a gamma of 2.4. This enables the most accurate colour and shadow balance for virtually everything most people will do and view.
- OSD: Brightness set to 52 as a starting point. Feel free to change this to whatever you feel comfortable.
- OSD: Contrast set to 66. This retains more highlight area detail. I found 70+ starts to crush out some highlight detail.
- OSD: Dark Stabilizer set to off.
- Windows: HDR mode disabled for normal PC use. Windows is not great when enabling HDR outside of games and media. Application windows and UX are not HDR aware, and colours look out of whack as a result. I prefer to just enable HDR before launching a game that supports HDR, then turning it off after exiting the game. Right click the desktop and select "Display Settings" to toggle HDR.
- Windows: Changing the refresh rate from 175Hz to 144Hz via Settings > Display > Advanced Display will not always change the colour output from 8-bit to10-bit. You will need to first enable 10-bit colour for 144Hz in the Nvidia Control Panel by navigating to the "Change resolution" screen. If you can spot flickering at 175Hz, then it is recommended to drop to 144Hz. The gaming performance difference between the two is very small, and the vast majority of modern games will not run anywhere near 144fps anyway let alone 175fps, even on an RTX 3090.
- Windows: If you installed the Dell monitor driver, then it may be wise to manually remove the active icc profile for the display as it interferes with colour output in some applications like Windows Photo Viewer. Do this by clicking the Start button and begin typing "colour management" and open the first result. From here tick the box labelled "Use my settings for this device" and then highlight the any profiles shown in the boxed area. Click the remove button. All applications will now be outputting in the sRGB colour space.
- Windows: In the Nvidia Control Panel, navigate to "Change desktop colour settings" and tick the box labelled "Override to reference mode". Some people have found that with this unticked by default, black pixels are not pure black, but instead a very dark black. This may have been because an icc colour profile was active from a previous change, or one of the sliders on this window were changed without realising. Reference mode ignores these and works with direct sRGB as would normally be the case out of the box.
- Windows: Installing the XBOX Game Bar app from the Windows Store will enable the shortcut key combo [WINDOWS KEY]+[ALT]+[B] to quickly toggle HDR on and off. The Game Bar app is also useful for other things, like game screenshots, performance metrics, and recordings.
- Windows: In the Windows HDR settings screen, setting the SDR brightness slider to around 10 will mellow down the brightness of darker tones that are otherwise enhanced too much when HDR is enabled in Windows. This may not matter in general as most will only be turning HDR on to jump into a game, or watch a movie, but it can be annoying for some. This setting simply equalises the SDR elements within Windows and applications, and I found a value of 10 brings those areas down to a similar brightness to standard SDR mode.
- Windows: Thanks to Reddit user Zeranor who pointed in the direction of Better ClearType Tuner,a utility that expands the potential of the Windows built-in ClearType tool to improve test quality. I found setting it to RGB with a contrast of 2200 to bring the text to similar quality as my old LG IPS panel.
Conclusion
This is what I have been waiting for, going from the world's first 34" ultrawide IPS to the world's first 34" QD-OLED has met all the expectations I had. As far as I am concerned now, LCD-based displays are dead to me and I can never look back.
Everything we love about OLED is featured on the AW3423DW, and then Dell Alienware has gone two steps further by featuring high-end performance and a factory calibration to both satisfy gamers and enthusiasts/professionals alike.
At £1099, this is a great monitor at a great price. And even though that figure may be out of immediate reach for many, it is still an affordable monitor when you consider the cost of other OLED monitors that are not as feature-rich for multitasking to the level this is. However, if you can get some Dell store discount codes, then it becomes a total no-brainer.
Regardless of whatever price you get it for, one thing is clear, and without jumping into highly specific gaming or professional monitors that only do one thing well, this is the best multi-use computer monitor that you can buy, period. Want to game with super smooth motion and fast response times? No problem. Want to edit media with accurate colours? No problem. Want inky black tones? No problem.
For a brand-new OLED technology to come out with this price, and then to offer three years of warranty that includes burn-in cover is really something special, and if this is where monitors are heading now going forwards, then count me in for a 38" QD-OLED with a vertical resolution of 1600 pixels to further improve productivity work.
If Dell can sort out the way it packages these things and make its customer support consistent with the level of support I received, then this easily becomes a 10/10 review verdict. As a product though, it easily is a 9, quirks withstanding, although I imagine Dell could sort those out too with a firmware update, and maybe tone down the fan curve too while they are at it.









_small.jpg)


19 Comments - Add comment